A first Madeira hike can go wrong before the walking begins. A route described as easy may still include wet stone, steep access paths, narrow ledges, tunnels, sudden fog and a return climb that feels harder than the outward walk. The safest beginner strategy is to start with a short, well-marked levada, check the official status on the same day, and leave the island’s high mountain routes for later.
What a Levada Walk Is and Why It Feels Different
Why the paths were built
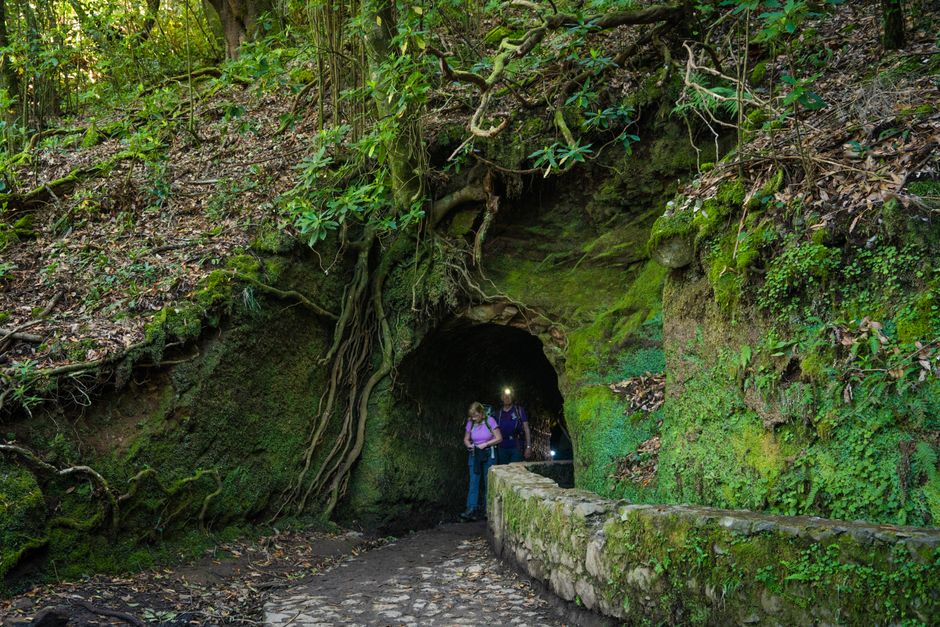
A levada is a narrow water channel built to carry water across Madeira’s steep terrain. Maintenance paths run beside many channels, creating walking routes through valleys, agricultural land and laurel forest. The design explains the main attraction: the route often stays at a steady level while the landscape drops sharply beside it.
That level feeling can mislead beginners. A path with little climbing may still feel exposed, slippery or tiring because attention stays fixed on footing. Some sections have walls or railings, while others have limited protection. The levada itself may also leave wet patches on the walking surface.
What the walk requires
The best beginner route is not simply the shortest one. It should have clear waymarks, a manageable return, a known starting point and an alternative if weather or confidence changes. PR 11 Vereda dos Balcões is a strong first choice because it is short, follows a straightforward route to a viewpoint and avoids the long commitment found on several famous waterfall walks.
The right expectation
Madeira’s levadas are walking routes, not smooth urban promenades. Expect roots, mud, uneven rock, low branches and occasional drops. The clear verdict is simple: treat every levada as a mountain path with water beside it, even when the official distance looks modest.
Which Beginner Route Should Come First?
For a first walk, PR 11 is the easiest introduction. PR 6 offers a bigger reward but demands more time and a stronger return plan. PR 9 is better saved until a beginner has already handled tunnels, damp surfaces and a longer out-and-back day.
Quick route comparison
| Route | Distance | Best for |
|---|---|---|
| PR 11 Vereda dos Balcões | 1.5 km each way | First levada-style walk |
| PR 6.1 Levada do Risco | 3 km each way | Beginners with basic walking fitness |
| PR 6 Levada das 25 Fontes | 4.3 km each way | Confident beginners arriving early |
| PR 18 Levada do Rei | 5.3 km each way | Walkers comfortable with a full day |
| PR 9 Levada do Caldeirão Verde | 8.7 km each way | Experienced hikers, not a first choice |
The best first-day verdict
Choose PR 11 if the goal is to understand Madeira’s landscape without committing the whole day. Choose PR 6.1 next if waterfalls matter more than distance. PR 6 is the best famous route for a confident beginner, but the initial descent and later climb back to the start make it harder than photographs suggest.
How to Plan a Safe Levada Day
Use this five-step routine
- Check the official status. Routes can close or gain restrictions after rockfall, fire, flooding or maintenance. Check the current listing before leaving accommodation, then check signs at the trailhead.
- Read the full distance. A route listed as 4.3 km may mean 4.3 km each way. Add both directions before judging the walk.
- Start early. Early departures reduce heat, crowds and the chance of reaching a high section after cloud builds. They also leave time for a slower return.
- Pack for wet ground. Wear shoes with firm grip, carry a light waterproof layer and protect a phone from spray. A small torch helps in tunnels, even when a route is officially open.
- Set a turnaround time. The waterfall or viewpoint is not the only destination. If the group is moving slowly, the safe decision is to turn around before fatigue affects balance.
What to check at the trailhead
Look for closure notices, arrows, barriers and warnings about one-way movement. Do not step around a closed gate for a better photograph. On a route with a controlled direction, follow the marked return rather than walking against the flow.
The strongest practical rule
Keep enough daylight and energy for the way back. A levada walk becomes risky when walkers reach the highlight tired, then discover that the return includes the same descent, a bypass or a long climb to the car park.
Why Madeira Weather Can Change the Difficulty
Distance is not the main variable
A short walk in steady rain can be harder than a longer walk on dry ground. Water runs across stone, moss becomes slick and visibility can disappear near forest edges. Mountain cloud may sit over one trail while the coast remains bright.
Low cloud and rain favour a short, low-commitment option such as PR 11. Clear, dry weather makes a longer waterfall route more sensible, provided the official status remains open.
Read the landscape before starting
Watch for strong wind at exposed viewpoints, swollen streams, fresh mud and water falling from slopes. These signs matter more than a forecast icon. A waterproof layer protects against drizzle, but it cannot make a narrow wet ledge safe.
Fog also changes navigation. Waymarks may become harder to see, and a return path can feel unfamiliar after the scenery disappears. Beginners should avoid starting a long route late in the day or continuing simply because the destination is close.
A Simple Three-Day Beginner Itinerary
Day one: learn the rhythm
Start with PR 11 Vereda dos Balcões. Allow time for the out-and-back walk, pauses at the viewpoint and a slow look at the forest. This day teaches how levadas feel underfoot without adding tunnels or a long climb. If the route feels uncomfortable, the short distance makes retreat easy.
Day two: add water and distance
Choose PR 6.1 Levada do Risco for a moderate step up. The route is longer, but the goal remains clear: follow the levada to the waterfall, pause, then return before legs become heavy. Add extra time for wet sections and crowded viewpoints.
Day three: choose the bigger objective
Use PR 6 Levada das 25 Fontes only if the first two walks felt controlled. Start early, allow several hours and accept the bypass or marked return required on the day.
This itinerary has a useful progression: short viewpoint, moderate waterfall, longer famous route. It avoids placing the hardest walk first, when poor footwear, slow pacing or uncertainty about Madeira’s terrain could spoil the rest of the trip.
Beginner Questions About Levada Walks
Are levada walks suitable for children?
Some are, but age alone does not decide suitability. A child needs to stay close, follow instructions and cope with uneven ground for the entire return. PR 11 is a better starting point than a route with tunnels, exposed edges or a long distance from the trailhead.
Are the famous waterfall walks easy?
They can be manageable for a fit beginner, but famous does not mean simple. PR 6 includes a full return distance, while PR 9 is much longer and includes tunnels. The correct verdict is to begin with PR 6.1 or PR 11 before attempting the longer routes.
Is a guide necessary?
A guide is not required for every marked route, but local knowledge helps when access changes, weather turns or transport arrangements become complicated. Independent walkers should carry route details, share the plan and avoid relying on a mobile signal in deep valleys.
Can a nervous walker enjoy Madeira?
Yes, if exposure is treated as a deciding factor rather than a challenge to overcome. Choose a route with a broad surface, limited drop-offs and an easy retreat. Confidence usually grows faster on three controlled short walks than on one dramatic route that feels frightening from the first kilometre.
Mistakes That Make an Easy Walk Go Bad
Five errors to avoid
- Choosing by photograph alone. A waterfall image says nothing about slippery steps, distance or the return climb.
- Ignoring the full route length. Out-and-back distances must be added together before setting a finish time.
- Starting after heavy rain. Water changes the surface, streams and visibility. A beautiful route may become a poor choice within hours.
- Walking in casual sandals. Open footwear offers little grip and leaves toes exposed to roots and rock.
- Leaving the marked path. Shortcuts can damage vegetation and place walkers above unstable slopes or beside unprotected drops.
When not to choose the famous route
Do not choose PR 6 or PR 9 as a first walk if the forecast is wet, the group includes someone uneasy with heights, or transport leaves a fixed departure time. Select a shorter route and keep the day flexible. A missed waterfall is a small loss; a rushed return on slick ground is not.
The final safety check
Before setting out, check the official classified trail status and read the official walking guidance. Conditions and access rules can change after this guide was written. The best beginner levada walk is the one that matches the day, leaves energy for the return and ends with enough confidence to walk again.