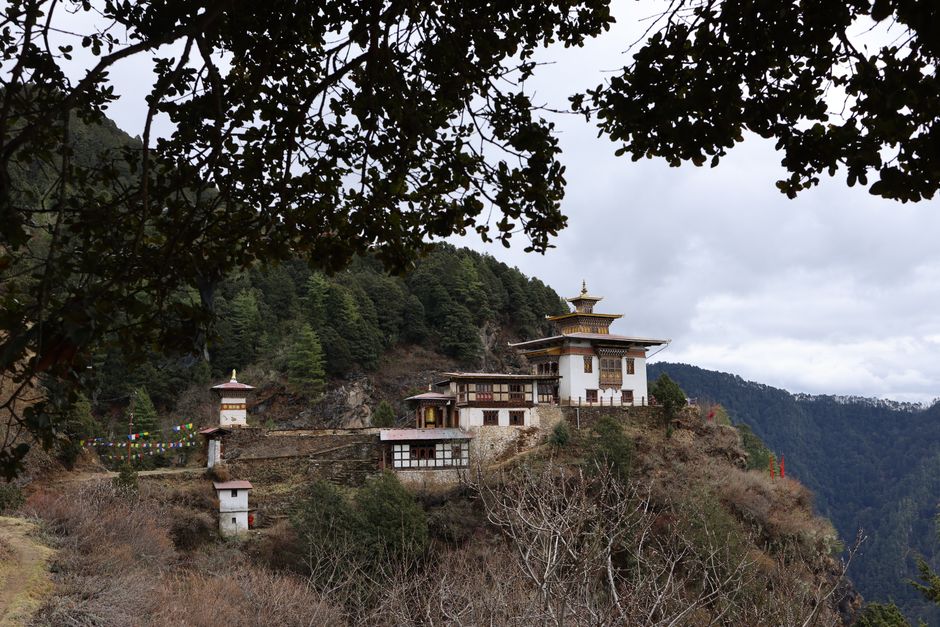
How many days are needed for Paro Valley and Tiger’s Nest, and what will the trip actually feel like? Four full days create a workable first visit. That allows time to adjust to the altitude, walk through Paro town, hike to Taktsang Monastery, and leave room for weather changes. The valley is beautiful, but it is not a quick photo stop. Roads are slow, mountain weather changes fast, and the hike demands more effort than its famous images suggest.
When should you visit Paro Valley?
The strongest first-time plan uses a clear-weather season and keeps the arrival day light. Spring and autumn usually bring the best balance of dry trails, mountain views, and comfortable daytime walking. Summer can bring rain and low cloud, while winter often brings crisp skies but colder mornings and shorter daylight. Each season has a different rhythm, so the right choice depends on the kind of day wanted in the valley.
Choose clear weather over a packed calendar
March through May is a good window for flowering valleys and mild walking conditions. September through November often brings sharp mountain views after the summer rain has passed. During June, July, and August, showers can affect road journeys and hide the upper cliffs around Tiger’s Nest. Winter gives Paro a quieter feel, but frost, cold stone floors, and early sunsets make an unhurried schedule more useful.
Keep at least one flexible morning in the plan. A cloud-covered monastery can turn into a clear view later the same day, and a wet trail can become slippery after heavy rain. The best itinerary treats weather as part of the route instead of forcing every activity into a fixed order.
Use the arrival day for altitude and orientation
Paro sits at roughly 2,200 metres above sea level, so the first day should involve gentle walking, water, food, and an early night. Do not schedule the Tiger’s Nest hike immediately after landing. Head into Paro town, visit a quiet temple or viewpoint, and learn the basic road plan before attempting the main climb.
Arrange required entry documents and transport details before arrival through an approved Bhutanese travel provider. Rules, fees, and permitted routes can change, so official guidance matters more than an old travel forum post. A local guide also adds context that signs and maps cannot provide, especially around monasteries, festivals, and village customs.
How do you hike to Tiger’s Nest?
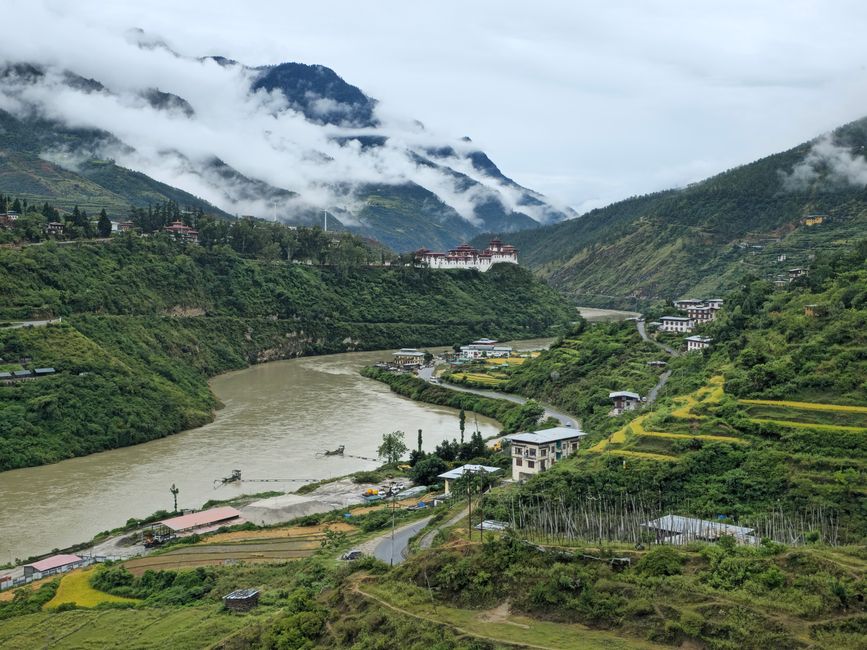
Tiger’s Nest, formally known as Taktsang Monastery, sits on a cliff above Paro Valley. The trail rises from the roadhead through pine forest, reaches a viewpoint, drops toward a waterfall, then climbs again to the monastery entrance. The round trip usually takes four to six hours, depending on pace, stops, trail conditions, and time spent inside the complex.
Follow this step-by-step hiking plan
- Start early. Leave after breakfast, ideally before the trail becomes busy and before afternoon cloud builds around the cliffs. A morning start also leaves time for a slower descent.
- Walk the first climb steadily. The opening section gains height through forest and can feel harder than expected at altitude. Use short steps, keep a conversational pace, and stop before exhaustion arrives.
- Take the viewpoint seriously. The classic view of the monastery appears from the first major lookout. Spend a few minutes there, but do not treat it as the end of the route. The trail continues downhill before the final approach.
- Manage the stairs after the waterfall. The route includes a long staircase section with uneven stone and railings. Keep one hand free, allow faster walkers to pass, and avoid rushing down wet steps.
- Allow time inside. Visitors may need to store bags and follow local instructions before entering the temple areas. Dress respectfully, keep voices low, and expect photography restrictions inside sacred rooms.
What should you expect on the trail?
The path is not a technical mountain route, but it is a sustained uphill walk with many stairs. Fitness helps, yet pacing matters more than speed. A person who walks regularly can usually complete it with breaks, while anyone unused to hills should add extra time and start conservatively. Horses may be available on part of the lower route, but they do not replace the climb to the monastery itself and should never be treated as a guarantee of an easy day.
Bring water, sun protection, a light rain layer, and food that can survive a few hours in a day bag. The trail can feel warm in direct sunlight and chilly in shaded forest. After rain, mud and slick stone change the effort required. The clearest verdict is simple: the best Tiger’s Nest strategy is a slow early start with no second major activity booked afterward.
What is the best Paro itinerary for four or five days?
A short trip works when each day has one main purpose. Paro Valley rewards wandering, but long road transfers and altitude make an overloaded plan tiring. The schedule below gives a first-time visitor a clear route while keeping one block open for weather or rest.
A four-day first visit
| Day | Morning | Afternoon | Evening |
|---|---|---|---|
| 1 | Arrival and transfer to Paro | Easy walk through town and nearby temples | Early dinner and rest |
| 2 | Tiger’s Nest hike | Return, shower, and quiet recovery | Short walk if energy allows |
| 3 | Paro Dzong and riverside route | Kyichu Lhakhang or a local village visit | Traditional meal and relaxed evening |
| 4 | Flexible weather morning | Departure or transfer toward Thimphu | Travel schedule dependent |
When to add a fifth day
Add a fifth day when the trip includes Thimphu, a festival, a longer village walk, or a second attempt at Tiger’s Nest after poor weather. The extra day also makes the journey more comfortable for people arriving after a long international flight. Use it as a buffer instead of filling every hour with sightseeing.
For a slower route, spend the first two nights in Paro, hike on the third morning, and reserve the fourth day for the dzong, valley villages, and a flexible local activity. This order places the most demanding walk after a period of adjustment and avoids turning the final departure morning into a race. The clear winner for a short visit is the four-day plan with one open half-day; it covers the main sights without making every delay feel like a crisis.
What should you pack for Paro and the monastery hike?
Pack for changing temperatures and respectful temple visits, not for a single sunny photograph. A small day bag, layered clothing, sturdy footwear, sun protection, and rain protection cover most of the practical needs. Heavy luggage adds little value because the day involves stairs, uneven ground, and long periods on foot.
Build the day bag around the trail
- Wear shoes with firm grip and enough support for uneven stone. Smooth casual soles become risky after rain.
- Use a light base layer, a warm middle layer, and a shell for wind or showers. The valley can feel warm while the upper trail feels cool.
- Carry water, a small snack, tissues, hand sanitizer, and any personal medication needed during a long walk.
- Bring sunglasses, sunscreen, and a hat. High-altitude sunlight can feel strong even when the air is cold.
- Keep valuables and loose items secure. The trail has steps, railings, and crowded viewpoints where an open pocket is inconvenient.
- Pack clothing that covers shoulders and knees for temple visits. A light scarf or overshirt makes this easy without changing the whole outfit.
Avoid the mistakes that make the hike harder
Do not wear new shoes for the first time on the trail. Blisters become a serious problem when the route still has several hours left. Do not rely on a thin fashion jacket, even in a warm forecast. Mountain wind and shade can change the temperature quickly.
Another common mistake is eating a heavy meal just before the climb. A simple breakfast and small snacks usually feel better than a large, rich plate. Avoid scheduling a late-night celebration before the hike, because poor sleep makes altitude and stairs feel much worse.
Turn around if dizziness, severe headache, chest pain, unusual breathlessness, confusion, or repeated vomiting develops. A famous viewpoint is never worth pushing through a dangerous symptom. The trip remains worthwhile even when weather, health, or trail conditions require a shorter route.